Saturday, November 19

Fall Burlap Bubble Wreath


Have I ever mentioned that I L-O-V-E Burlap?

Yep, it’s true… Here is my latest Burlap obsession!
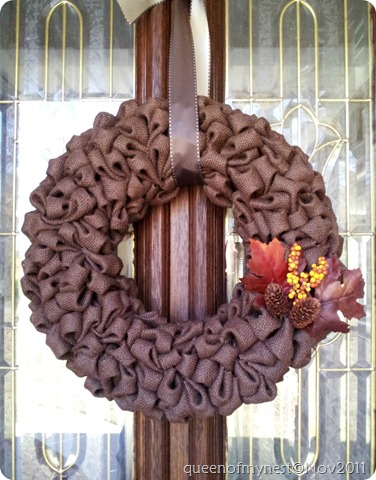
Burlap Front Closeup Edit
My inspiration came from Janet @ Today's Fabulous Finds. A few months ago, she gave her readers such a treat when she revealed her beautiful Burlap Bubble Wreath. From the moment I saw her beautiful wreath, I knew I wanted to make one. Oh yes, this will be one of my go to wreath patterns!

I will warn you now… this post is heavy on pictures (most of you know photography is not my specialty) but I am just so pleased with how it turned out {insert happy dance} I must share!
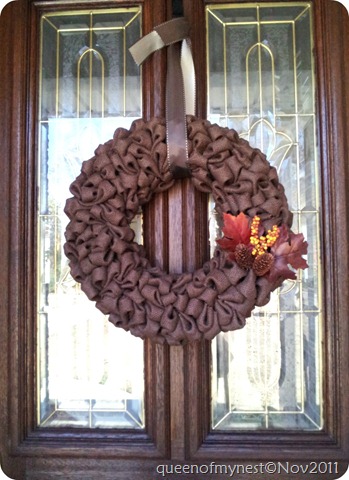
Burlap Front Door 1edit
I had plenty of Burlap on hand for this project; try a stash of 18-yards of Burlap. Yes, you read it correctly - I had almost two bolts of this stuff. Now, before you say, “she’s gone loco”, the Burlap was used at my Son’s outdoor wedding reception last year and even after giving the church some Burlap – I still have about 18 yards left.

Nevertheless, look what you can make with all that burlap!

Bubble Wreath 1edit
Today is your lucky day because I am going to spare you from my version of a tutorial. Why you ask… because Janet @ Today’s Fabulous Finds has a wonderful tutorial {HERE} and honestly I would not change a thing about it.

I can however, share a few Do’s & Don’ts because you know we always try our own short cuts, substitutions and creative spins {you know who you are}. Who me????
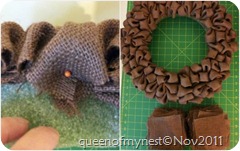
Burlap Material Collage
My wreath was bigger than the one she used – it was a 14 inch so I had to cut more squares (over 150) but I still used her dimensions of 4x4 square. I did try a little bigger square NOT good, so I recommend sticking with her dimensions.

1. Use Burlap or a heavier fabric – it will form and hold the bubble shape better. I played around with some Burlap that I had washed to make my table runner and the soft washed Burlap didn’t’ work well at all.

2. Use large head straight pins – I ran out and tried to use my quilting straight pins with smaller heads and believe me when I say you will use 3 pins to the 1 large head pin. I also had to glue a few areas down because the small pins did not feel secure enough around the edges. Save yourself some time and money… Use large head straight pins

3. The only wreath I could find locally was one of the squared circle (green foam) wreaths and I really think that the rounded circle (covered) foam that Janet used would work so much better.

4. I should have covered the backside of the wreath with Burlap because my front door has glass panes and you can see the naked unfinished side from the inside of the house. It really isn’t a big deal I’m just a perfectionist!
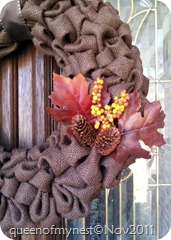
Burlap details 3edit

If you haven’t ever visited Janet over at her blog Today’s Fabulous Finds, I encourage you to go check it out. Seriously, you will find it full of crafty inspiration. The Thanksgiving Mantel she created is beautiful and just wait until you see the Thanksgiving subway art she made and is sharing with her readers. I think it will quickly become one of your favorite blogs!
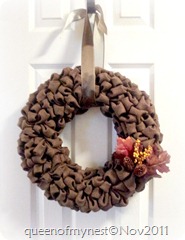
Bubble Wreath 1edit

This is by far my favorite wreath that I have made. It was very easy and super fun to put together and I think it has such a classy look.

How about one more picture…
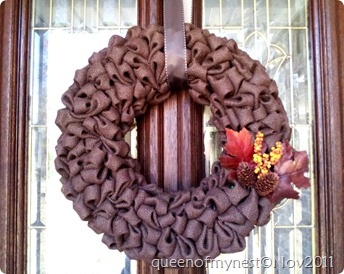
Burlap Front Closeup 1edit

I hope you are inspired to make one of your own and if you do, make sure to let me know because I would love to see it!

Thanks for hanging in there and letting me share my latest obsession!

Until next time…


Simpy AJ Signature edit 


ricrac yellow blog size
I’m linking this project to my favorite parties listed over on my sidebar

Pin It


This project was featured at these Awesome Blogs... Thank You!


Tuesday, November 8

Pretty Apple Kitchen Towel Set


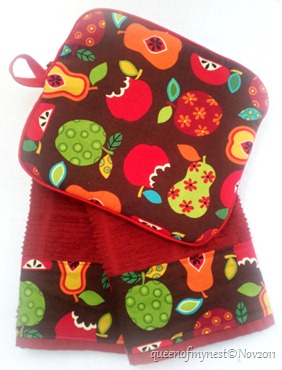
Today, I wanted to share a little kitchen set I made as a small “happy” for a friend of the family. She is a sweet young lady who has just moved into her very own first place. It’s my Daughter-in-Laws sister and she told me that her sister was decorating the kitchen in Apples. Now, here’s the ironic part…  View5edit
This Apple print fabric was a lucky find at Joann’s when we were in Florida this past September (It’s sad, but I don’t have a Joann’s close by in my small AL town). We have a set in stone routine, no matter what, we will make time for me to visit Joann’s when we are in Tallahassee so I can stock up on items that I normally can’t get unless I order online.


So anyway, the sales clerk told me that this fabric was new and they had just put it out that morning. How lucky is that?? I loved the print and without any project in mind, bought a few yards for my stash.
Well, when I heard about my DIL’s sister using Apples to decorate her kitchen I knew exactly what I was going to do…
view3edit


This was my first attempt at making a potholder but Potholder2editafter searching around Pinterest and getting a few pointers, I made my own pattern and started sewing. I took the measurements from one of my favorite potholders and added a little extra for the seam. I decided to add solid red binding. I think it turned out great!    

Side note: The padding should be fire resistant if you can find it other wise regular padding will work. I just made sure to tell her that the potholder was not fire resistant.


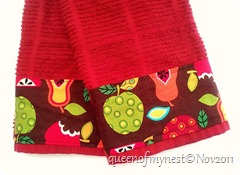
Towels1editThe dishtowels are just basic kitchen towels from Wal-Mart. All I did was add a band to the bottom to jazz them up a bit. This is such a super easy way to customize any towel to match a theme.


Note: I always pre-wash my fabric and towels so the colors won’t bleed and the fabric can shrink.
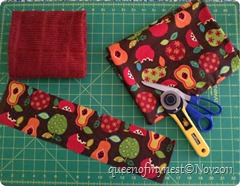
      toolsedit

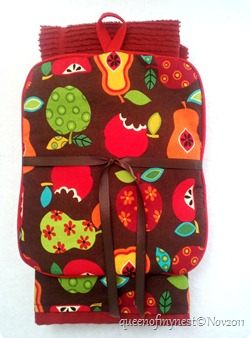
This makes such a simple but personalized gift whether given alone or dressed up in a basket surrounded with various kitchen utensils. view1edit
I am very pleased with how it turned out and my little friend just loved them! What do you think… pretty cute, huh??


I am finishing up my Fall wreath and a few other decorations that I hope to have posted by the end of the week. I can’t wait to share them with you! 


Until next time…
Simply AJ


I'm linking up with all of the fun parties listed below... stop by and check out all of the great projects and grab some inspiration! 


Made-by-you-Monday @ Skip to my Lou

Get Your Craft On @Today’s Creative Blog

Tutorial and Tips Link Party @Home Stories A 2 Z

Tuesday Time Out @Reason to Skip the Housework

Tuesday Confessional @Confessions of a Stay at Home Mommy

Tuesday Talent Show @Chef In Training

Time to Shine @A Diamond in the Stuff

What’s Up Wednesday @Sew Woodsy

Wow Me Wednesday @Ginger Snap

Whatever goes Wednesday @Someday Crafts

Linkin' with Lil' Luna @Lil Luna

Show & Share with Southern Lovely @Vintage Gwen

Made by ME @JAQS Studio

Hookin up with HoH @House of Hepworths

Kissed by a Frog

A Little Knick Knack

Somewhat Simple

Crafty Scrappy and Happy Me Thursday @Crafty Scrappy and Happy

Friday-Flair @Whipperberry

BFF Open House Link Party @The Answer is Chocolate

Friday Link Party @Creative Corner

Refresh your Nest Friday’s @Making Lemonade

Freestyle Friday @Happy Hour Projects

Frugal Friday @The Shabby Nest

Weekend Wrap Up @Tater Tots and Jello

Whatcha got weekend @Lolly Jane

Strut your Stuff @The Saturday Morning Blog

Saturday Nite Special @Funky Junk Interiors

I Heart Naptime

Think Pink Sundays @Flamingo Toes

Passionately Artistic